So, you're wondering how do I SSH into an IoT device Windows 10, right? Well, buckle up because this is about to get interesting. Imagine this: you're sitting at your desk, staring at your IoT device, and you need to get in there like a boss. SSH (Secure Shell) is your golden ticket to accessing and managing remote devices securely. But here's the deal—Windows 10 wasn’t always the best friend of SSH enthusiasts, but now, it’s totally doable! Let’s dive into the nitty-gritty of making it happen, shall we?
Now, let me break it down for you. SSH is not just some random tech jargon—it’s a protocol that lets you control your IoT devices remotely. Whether you're tinkering with a Raspberry Pi or any other smart gadget, SSH is the go-to method for secure communication. And guess what? Windows 10 now supports SSH natively, which means no more third-party apps or headaches. Cool, right?
Before we jump into the deep end, let’s get something straight. This guide isn’t just about telling you to click a few buttons. We’re going to cover everything from setting up your IoT device to troubleshooting common issues. By the end of this, you’ll be an SSH wizard on Windows 10. So, grab your coffee, and let’s get started!
Read also:Sone 436 Japanese Your Ultimate Guide To Discovering This Cultural Gem
Table of Contents:
- Setting Up SSH on Your IoT Device
- Enabling SSH on Windows 10
- Connecting to Your IoT Device via SSH
- Using Third-Party SSH Tools
- Securing Your SSH Connection
- Troubleshooting Common SSH Issues
- Advanced SSH Tips and Tricks
- Automating SSH Tasks
- The Future of IoT and SSH
- Conclusion and Next Steps
Setting Up SSH on Your IoT Device
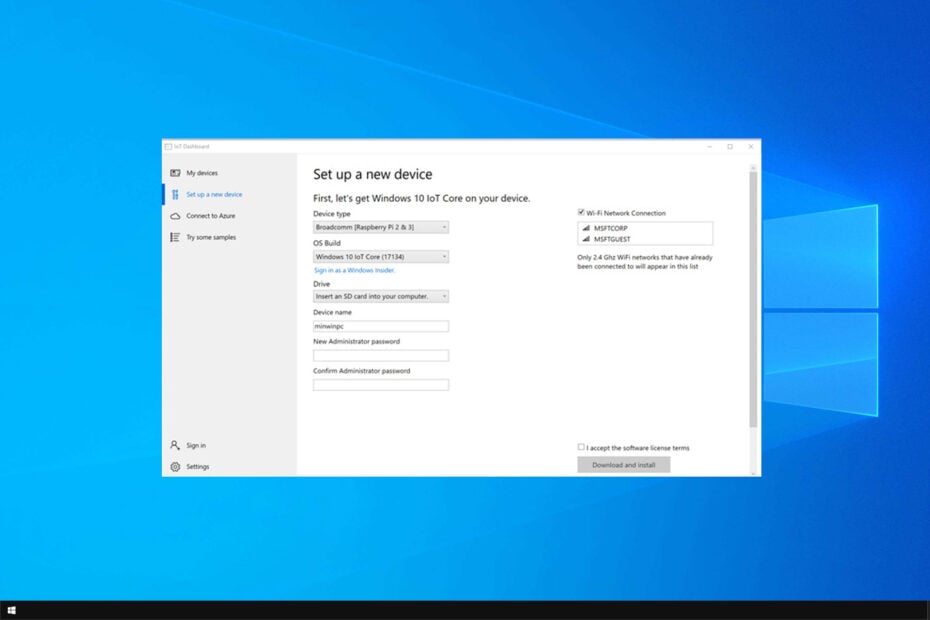
Alright, first things first. You can’t SSH into your IoT device if it’s not ready for the action. Setting up SSH on your IoT device is like preparing the stage for a rock concert—you need everything in place. Here’s what you need to do:
Step 1: Enable SSH on Your IoT Device
Most IoT devices, like Raspberry Pi or Arduino-based systems, come with SSH disabled by default. You’ll need to enable it manually. For example, on a Raspberry Pi, you can enable SSH by running:
sudo raspi-config
Then navigate to the SSH option and enable it. Boom! Done.
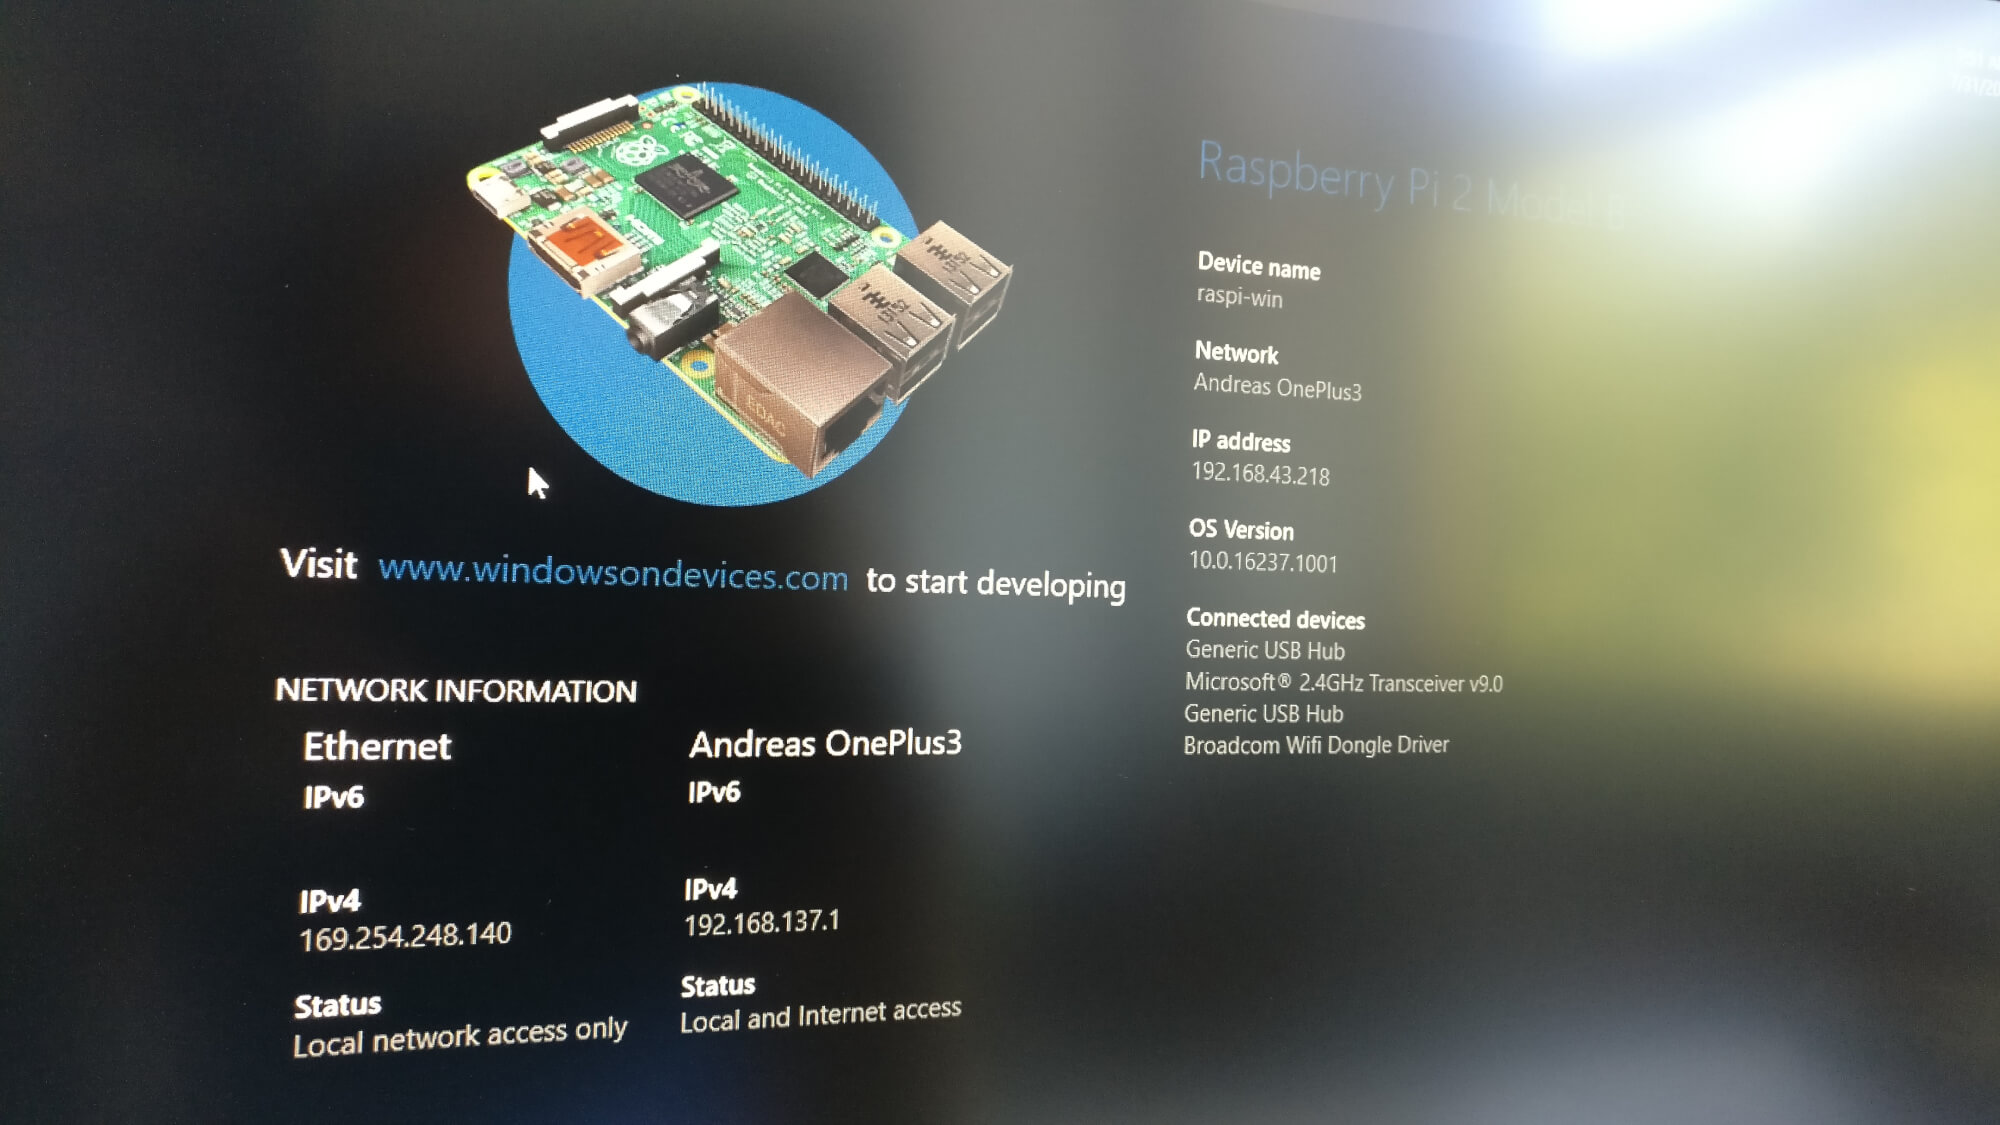
Step 2: Find the IP Address
Next up, you need to know the IP address of your IoT device. This is crucial because you’ll need it to connect via SSH. You can usually find the IP address in your device’s settings or by running:
Read also:Tan Chuan Jin Wife Divorce The Untold Story Behind The Headlines
ifconfig or ip addr
Take note of the IP address because you’ll need it later.
Enabling SSH on Windows 10
Now that your IoT device is ready, it’s time to prep your Windows 10 machine. Believe it or not, Windows 10 now has SSH built-in, which makes life a whole lot easier. Here’s how you enable it:
Step 1: Open Windows Features
Go to Control Panel > Programs > Turn Windows features on or off. Scroll down until you see "OpenSSH Client" and check the box. Hit OK, and you’re good to go.
Step 2: Test the SSH Client
Open up your Command Prompt or PowerShell and type:
ssh
If you see a bunch of SSH-related info, congrats—you’ve successfully enabled SSH on Windows 10!
Connecting to Your IoT Device via SSH
Alright, the moment of truth. It’s time to connect to your IoT device via SSH. Here’s how you do it:
Using Command Prompt or PowerShell
Open up your favorite terminal and type:
ssh username@ip_address
Replace "username" with the username of your IoT device and "ip_address" with the IP address you noted earlier. If everything is set up correctly, you should see a prompt asking for your password. Enter it, and voilà—you’re in!
Using PuTTY (Optional)
If you’re old school and prefer using PuTTY, you can download it and enter the IP address of your IoT device. Click "Open," and you’ll be prompted for your username and password. Easy peasy.
Using Third-Party SSH Tools
While Windows 10 has a built-in SSH client, sometimes you might want to use third-party tools for more advanced features. Here are a few popular ones:
- WinSCP: Great for file transfers over SSH.
- PuTTY: A classic SSH client with tons of customization options.
- MobaXterm: A powerful tool that combines SSH, FTP, and terminal emulation.
These tools can make your life easier, especially if you’re dealing with multiple IoT devices.
Securing Your SSH Connection
Security should always be at the forefront of your mind when dealing with SSH. Here are a few tips to keep your connections safe:
1. Use Strong Passwords
No, "123456" doesn’t count as a strong password. Use a mix of letters, numbers, and symbols to make it harder for hackers to crack.
2. Enable Key-Based Authentication
Instead of using passwords, you can set up key-based authentication. This involves generating a public and private key pair. Here’s how:
- Run
ssh-keygenon your Windows machine. - Copy the public key to your IoT device using
ssh-copy-id username@ip_address. - Test the connection without entering a password.
3. Disable Root Login
Prevent unauthorized access by disabling root login. You can do this by editing the SSH config file on your IoT device:
sudo nano /etc/ssh/sshd_config
Set PermitRootLogin no and restart the SSH service.
Troubleshooting Common SSH Issues
Let’s face it—things don’t always go as planned. Here are some common SSH issues and how to fix them:
Problem 1: Connection Refused
This usually happens if SSH isn’t enabled on your IoT device. Double-check that SSH is running and that the IP address is correct.
Problem 2: Permission Denied
If you’re getting a "permission denied" error, it could be due to incorrect credentials or misconfigured SSH settings. Make sure your username and password are correct, and check the SSH config file for any issues.
Advanced SSH Tips and Tricks
Once you’ve mastered the basics, it’s time to level up your SSH game. Here are a few advanced tips:
Tunneling with SSH
SSH tunneling allows you to securely access services on your IoT device. For example, you can tunnel HTTP traffic to access a web server running on your device. Here’s how:
ssh -L 8080:localhost:80 username@ip_address
Now, open your browser and go to http://localhost:8080.
Port Forwarding
Port forwarding is another powerful feature of SSH. It allows you to forward traffic from one port to another. For example, you can forward traffic from port 22 (default SSH port) to port 2222:
ssh -p 2222 username@ip_address
Automating SSH Tasks
Who has time to manually SSH into their IoT devices every day? Automate the process using scripts. Here’s an example:
ssh username@ip_address "sudo systemctl restart service_name"
This script will automatically restart a service on your IoT device. You can schedule it to run at specific intervals using tools like Task Scheduler on Windows.
The Future of IoT and SSH
As IoT continues to grow, SSH will remain a crucial tool for managing and securing these devices. With advancements in encryption and authentication methods, SSH will only become more secure and efficient. Keep an eye on emerging technologies like quantum-resistant cryptography, which could revolutionize the way we approach secure communications.
Conclusion and Next Steps
Well, there you have it—a comprehensive guide on how to SSH into an IoT device on Windows 10. From setting up your device to securing your connections, we’ve covered everything you need to know. But remember, this is just the beginning. The world of IoT and SSH is vast, and there’s always more to learn.
So, what’s next? Here are a few suggestions:
- Experiment with different SSH tools and techniques.
- Stay updated on the latest security best practices.
- Join online communities to share your knowledge and learn from others.
And don’t forget to leave a comment below if you have any questions or tips of your own. Happy SSH-ing!