So listen up, friends. If you're diving into the world of Raspberry Pi or you're already knee-deep in this awesome little device, you might be wondering, "How can I access my Pi remotely without breaking the bank?" Well, buckle up because we're about to dive deep into the world of accessing your Raspberry Pi remotely—for free! That's right, gratis, no charge, nada. Let's get started, shall we? oh and by the way, this isn’t just some basic how-to. We’re going to break it down step by step so even if you’re a total newbie, you’ll walk away feeling like a pro. Trust me, it’s gonna be epic.
Now, why is accessing your Pi remotely so important? Think about it—imagine being able to control your home automation system, monitor security cameras, or even debug your projects from the comfort of your couch or halfway across the globe. Sounds pretty cool, right? With the right tools and a bit of know-how, you can do all that and more without spending a dime on expensive software or services. So, let’s make this happen!
Before we get into the nitty-gritty, let’s set the stage. This guide is packed with actionable tips, tricks, and insights that will help you master the art of remote access. We’ll cover everything from setting up your Pi for remote access to troubleshooting common issues. And don’t worry, we’ve got your back with plenty of resources and links to reliable sources so you can trust what you’re learning. Ready? Let’s go!
Read also:Discover The Ultimate Fun With Masafun Your Gateway To Adventure
What Exactly is Access Pi Remotely Free?
Alright, let’s start with the basics. Accessing your Raspberry Pi remotely for free means being able to control, manage, and interact with your Pi from another device—whether it’s a laptop, smartphone, or even another Pi—without paying for any third-party services. Sounds too good to be true? It’s not. With a bit of setup and the right tools, you can achieve seamless remote access that’s both reliable and cost-effective.
Here’s the deal: remote access isn’t just about convenience. It’s about empowering you to do more with your Pi, no matter where you are. Whether you’re a hobbyist tinkering with IoT projects or a developer building complex applications, having remote access is a game-changer. And the best part? You don’t need to fork out cash for pricey solutions. There are plenty of free tools and methods that work just as well—if not better.
Why Should You Care About Remote Access?
Let’s face it: life gets busy, and sometimes you don’t have the luxury of sitting in front of your Pi to make changes or check on your projects. Remote access gives you the freedom to manage your Pi from anywhere, anytime. Here are a few reasons why you should care:
- Convenience: No more rushing home to tweak your code or check on your project. You can do it all from your phone or laptop.
- Flexibility: Whether you’re working on a home automation system or building a weather station, remote access allows you to monitor and control your setup without limitations.
- Cost-Effective: Why spend money on paid services when you can achieve the same results for free? With the right tools, you can save big while still getting professional-grade functionality.
- Learning Opportunity: Setting up remote access is a fantastic way to deepen your understanding of networking, security, and troubleshooting. It’s like a hands-on masterclass in tech skills.
Setting Up Your Raspberry Pi for Remote Access
Alright, now that we’ve covered the what and why, let’s get into the how. Setting up your Raspberry Pi for remote access might sound intimidating, but it’s actually pretty straightforward. Follow these steps, and you’ll be up and running in no time.
Step 1: Update Your Pi
First things first, make sure your Pi is up to date. This is super important because outdated software can cause compatibility issues and security vulnerabilities. Open a terminal on your Pi and run the following commands:
sudo apt update && sudo apt upgrade
Read also:Jimmy Fallon Political Party 2024 The Inside Scoop You Wonrsquot Want To Miss
Simple, right? This ensures your Pi is running the latest software versions, which is crucial for smooth remote access.
Step 2: Enable SSH
SSH (Secure Shell) is your best friend when it comes to remote access. It allows you to securely connect to your Pi from another device. To enable SSH on your Pi, head over to the Raspberry Pi Configuration tool:
- Open the terminal and type: sudo raspi-config
- Select “Interfacing Options”
- Choose “SSH” and enable it
- Reboot your Pi: sudo reboot
And just like that, SSH is ready to roll.
Step 3: Find Your Pi’s IP Address
Knowing your Pi’s IP address is essential for connecting to it remotely. To find it, simply type the following command in the terminal:
hostname -I
This will display your Pi’s local IP address. Write it down—you’ll need it later.
Free Tools for Accessing Your Pi Remotely
Now that your Pi is set up, let’s talk about the tools you’ll need to access it remotely. There are tons of options out there, but we’ll focus on the best free ones that deliver top-notch performance.
1. PuTTY
PuTTY is a classic and highly reliable SSH client that works on Windows, macOS, and Linux. It’s simple to use and packed with features. Here’s how to get started:
- Download PuTTY from the official website
- Open PuTTY and enter your Pi’s IP address in the “Host Name” field
- Set the port to 22 (default for SSH)
- Click “Open” and log in using your Pi’s credentials
Boom! You’re connected.
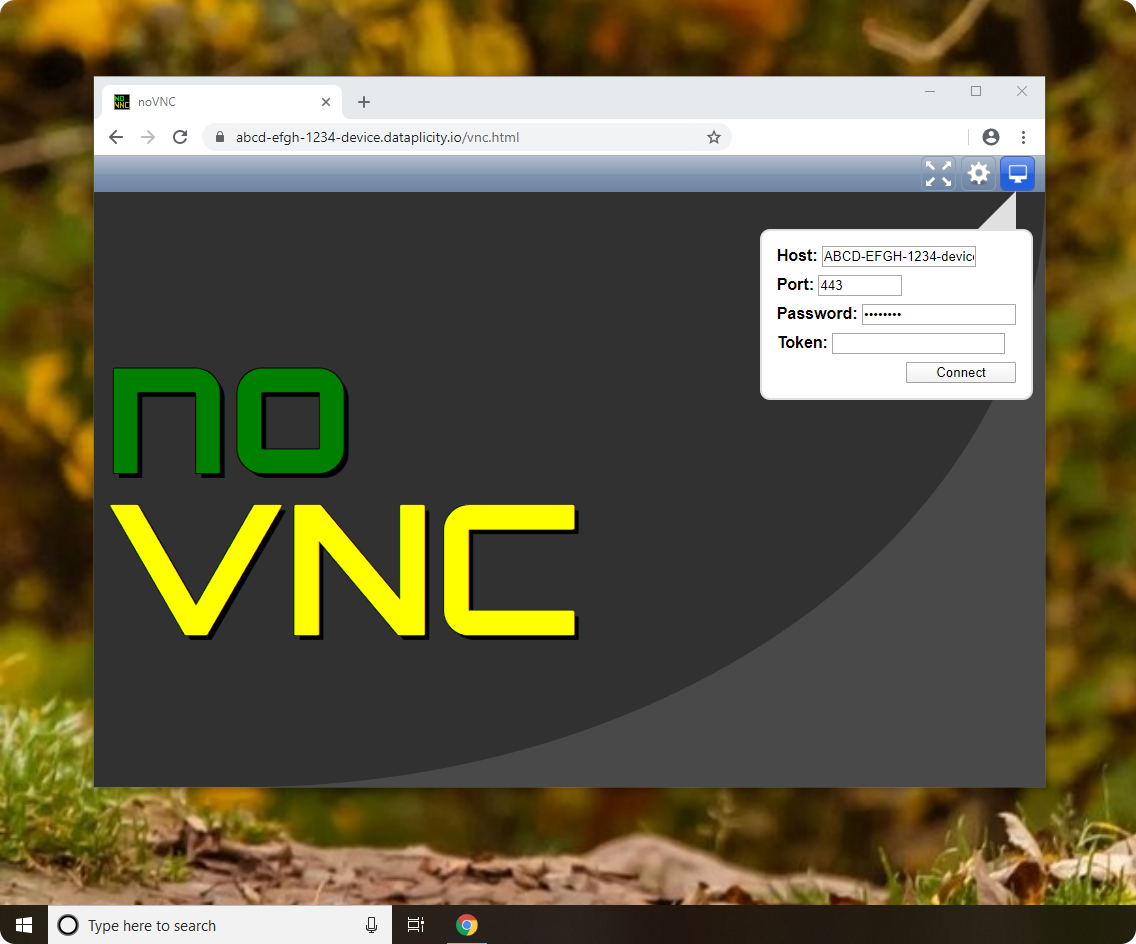
2. VNC Viewer
If you prefer a graphical interface, VNC Viewer is the way to go. It lets you access your Pi’s desktop remotely, which is perfect for tasks that require a GUI. Here’s how to set it up:
- Enable VNC in the Raspberry Pi Configuration tool
- Download VNC Viewer on your device
- Connect to your Pi using its IP address
Voila! You’ve got full control over your Pi’s desktop.
3. Web-Based Solutions
For those who prefer web-based tools, there are options like WebSSH and WebVNC. These allow you to access your Pi through a browser, which is super convenient if you’re on the go. Just be mindful of security settings to keep your Pi safe.
Securing Your Remote Access
Security is key when it comes to remote access. You don’t want unauthorized users gaining access to your Pi, right? Here are a few tips to keep your setup secure:
1. Use Strong Passwords
Weak passwords are a hacker’s dream. Make sure your Pi’s login credentials are strong and unique. Avoid using common words or phrases, and consider using a password manager to keep track of them.
2. Enable Two-Factor Authentication
Two-factor authentication adds an extra layer of security by requiring a second form of verification. It’s a bit more involved to set up, but it’s well worth the effort.
3. Regularly Update Your Pi
We mentioned this earlier, but it bears repeating. Keeping your Pi updated is crucial for patching security vulnerabilities and ensuring smooth operation.
Troubleshooting Common Issues
Even the best-laid plans can hit a snag. If you’re having trouble accessing your Pi remotely, here are a few common issues and how to fix them:
Issue 1: Can’t Connect to Pi
This usually happens if your Pi’s IP address has changed. Double-check the IP address and make sure your network settings are correct.
Issue 2: SSH Not Working
If SSH isn’t working, try disabling and re-enabling it through the Raspberry Pi Configuration tool. Also, ensure that your firewall isn’t blocking port 22.
Issue 3: Slow Connection
A slow connection can be frustrating. Check your internet speed and consider using a wired connection instead of Wi-Fi for better performance.
Advanced Tips for Pro Users
If you’re feeling confident and want to take your remote access skills to the next level, here are a few advanced tips:
1. Set Up a Static IP
A static IP ensures that your Pi always has the same address, making it easier to connect. This is especially useful if you’re accessing your Pi from outside your local network.
2. Use Port Forwarding
Port forwarding allows you to access your Pi from anywhere in the world by forwarding specific ports on your router to your Pi’s IP address. It’s a bit more complex, but it’s incredibly powerful.
3. Automate Tasks with Scripts
Why do things manually when you can automate them? Write scripts to perform routine tasks, and set them up to run automatically when you connect remotely.
Conclusion: Unlock Your Pi’s Potential
There you have it, folks—a comprehensive guide to accessing your Raspberry Pi remotely for free. From setting up SSH to securing your connection, we’ve covered everything you need to know to take full control of your Pi from anywhere. Remember, the key to success is practice and perseverance. The more you experiment with remote access, the more confident you’ll become.
So, what are you waiting for? Dive in, explore, and unleash your Pi’s full potential. And don’t forget to share your experiences in the comments below. Whether you’ve got questions, tips, or success stories, we’d love to hear from you. Happy tinkering, and see you on the next adventure!
Table of Contents
- What Exactly is Access Pi Remotely Free?
- Why Should You Care About Remote Access?
- Setting Up Your Raspberry Pi for Remote Access
- Free Tools for Accessing Your Pi Remotely
- Securing Your Remote Access
- Troubleshooting Common Issues
- Advanced Tips for Pro Users
- Conclusion: Unlock Your Pi’s Potential